

I’m going to show you how easy it is to optimize a blog post with Yoast’s SEO plugin. This tutorial is specifically about how to optimize a blog post with Yoast. So, I won’t go into all the other elements of SEO in this post – because there is so much more to SEO.
Yoast is an SEO plugin for WordPress. It is a free tool for on-page optimization. On-page SEO is the easiest aspect of SEO, but most people don’t understand how to do it. Yoast makes it incredibly easy.
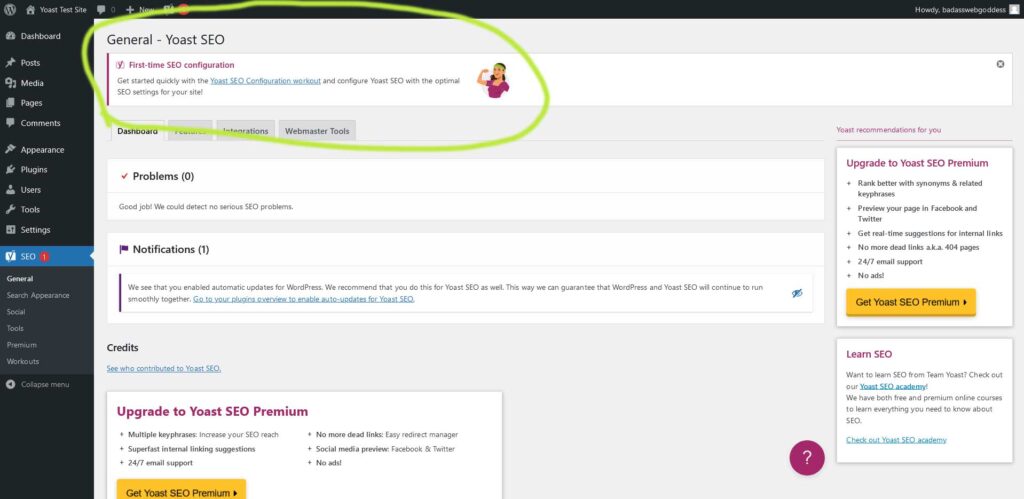
I am going to assume you already have Yoast installed, but if you don’t you’ll need to do that first. Once you have Yoast installed, make sure you use the Yoast Configuration Workout tool. You’ll see a link to it at the top of your WordPress dashboard. You need to do this step before you can start optimizing your content.
Once you have that done, you can start using Yoast. I am going to explain how I optimize blog posts. I always write my blog posts first in Google docs. Then I copy and paste my blog post into Yoast and optimize it. If you prefer, you can write your posts directly in the WordPress post editor.
How to Optimize a Blog Post with Yoast in 10 Easy Steps
Step 1 Choose your keyword (or focus keyphrase)
It’s easiest to choose your keyword before you start writing your post, but you can write the post first and then decide on a keyword. This is the one thing most people get wrong with Yoast. You can optimize a blog post with Yoast for any keyword you want. But, just because your post is optimized doesn’t mean it’s going to rank well in Google.
For blog posts, it’s best to go with a long-tail keyword. A long-tail keyword is typically a 4-5 word keyword phrase but it can be longer. The reason why you want to use long-tail keywords is that they are so much less competitive than short-tail keywords. Short tail keywords are usually only 1 or 2 words. They are also much more competitive and hard to get to the top of Google, no matter how good you are at SEO.
Step 2 Write your blog post
Don’t worry too much about SEO at this point. Just write your post. I always use an outline. It makes writing the post easier and it will help later when you go to optimize it. Your outline should contain all the main points you want to include in your post. Use your outline as a guide, and write paragraphs for each section of your outline. Once you complete your entire, post, you can optimize it.
Step 3 Add headers you your post
Before I even add my posts to WordPress, I go through and break up all the paragraphs with headers. This is not only good for SEO, but it makes your posts easier to read. Keep in mind most people skim your content so make sure your headers highlight all the main points of your post.
Step 4 Copy and paste your post into WordPress
Once you have your post written and headers added to your post, you can copy and paste it into WordPress. After you have optimized a few blog posts using Yoast, you’ll have a good idea of what needs to be done to optimize your post even before you add it to WordPress.
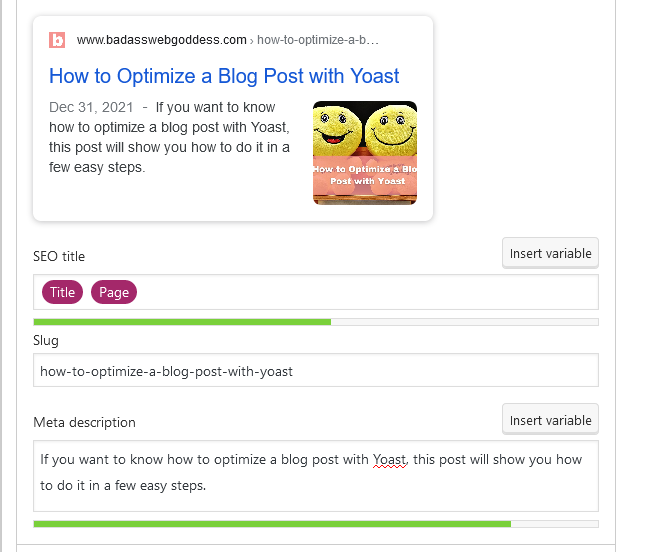
Step 5 Add your keyphrase to Yoast
Scroll down to the bottom of your post in the WordPress post editor. You’ll see Yoast SEO. Underneath that, you’ll see 4 tabs – SEO, Readability, Schema, and Social. Before you add your keyphrase, the SEO and Readability tab will both have a red circle. Type your keyphrase into the box that says focus keyphrase.
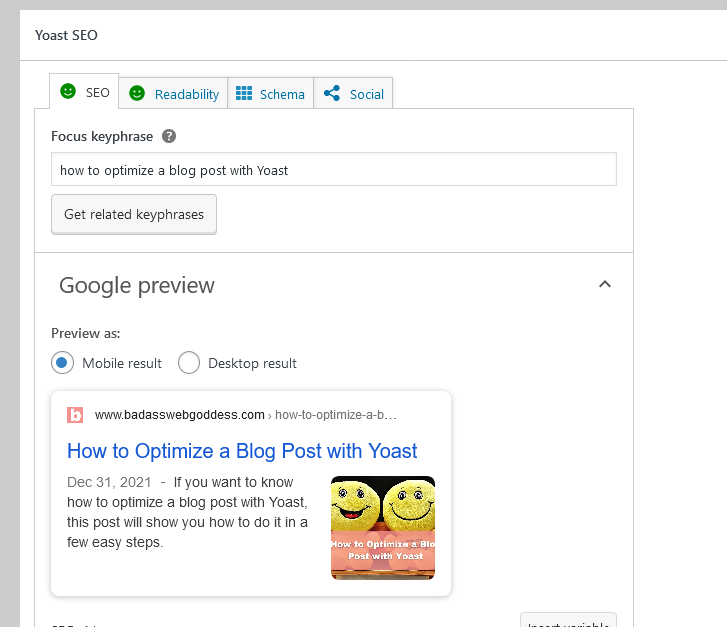
Step 6 Add a meta description
After you’ve added your focus keyphrase, type your meta description in the box where it says meta description. I usually just copy and paste a sentence from my intro paragraph. However, make sure your meta description contains your keywords.
Step 7 Check the Readability Analysis with Yoast
Once you’ve added your meta description, check the readability analysis. You should see a green simile on the readability tab. If you don’t, click on the tab and check the bullets. The two most common problems I have are not using enough transition words and not using enough active voice.
Sometimes, you will not get a green simile no matter what you do. This is because the readability analysis is just a tool that helps you write for the average reader. If you write on a complex topic, you may have to write at a higher reading level than what Yoast likes to see.
Step 8 Check the SEO analysis with Yoast
Next, check the SEO analysis tab. Unless you are really good at SEO, you probably won’t see a green simile. That’s okay. That’s what Yoast is there for. Click the arrow to expand the analysis. You will see green bullets next to every item that is optimized, and red bullets next to the items that need improvement.
Yoast will tell you exactly what needs to be changed, but I am going to give you a few pointers.
Outbound links: You do not have to have outbound links to optimize a post, but they can improve your SEO analysis.
Images: It’s always best to add images to your posts. Make sure when you save your images they are saved with an SEO-friendly name. In other words, you don’t want to upload images saved as 34789Y.jpg. The image itself should be descriptive and use your keyword whenever possible.
Additionally, make sure you add a keyword-rich alt text description of every image. Sometimes the alt text on your images can significantly improve your on-page SEO.
Internal links: If possible always include internal links in your posts.
Meta description length: While Yoast gives you a green bullet for your meta description, search engines don’t really use meta descriptions when they rank your content. Why they are important is not for on-page SEO, but rather for click-through rate.
You want your meta description to entice the reader to click on your result in a search engine. Don’t just use keywords in your meta description, use your meta description as a tool to improve your click-through rate.
Tips for keyphrase optimization with Yoast
Keyphrase in introduction: It’s best to work your keyphrase into your introduction, but sometimes you just can’t. Your content needs to be user-friendly and easy to read, so if you can’t fit your keyphrase into the introduction smoothly, try not to worry about it. Google is pretty sophisticated and can figure out what your blog post is about even if you don’t get every bullet to turn green.
Keyphrase length: Yoast will tell you if it thinks your keyword phrase is too long. I use a keyword tool for keyword research, so I generally don’t worry about this one.
Keyphrase density: It’s really easy to overuse or underuse keywords. Yoast analyzes the keyword density based on how many words are in your post. If you find you have underused your keyword, squeeze it into your content more frequently. Or if you’ve over-optimized, you can swap your keyword with a synonym or add some more text to your post to improve the keyword density.
When using keywords in your content, you do not have to use them exactly as they are written in your focus keyphrase As long as you phrase all your keywords in one sentence, Yoast will count it.
Previously used keyphrase: You don’t want to use the same keyphrase on 2 different posts.
Keyphrase in subheading: Yoast may tell you to add keywords to your subheadings. Or, it might tell you that you’ve used your keyword too much in your subheadings. If you need more keyword headings, just add a few or rewrite some of your headings to include your keywords.
If you have used your keyword too often, you can remove the subheadings, rewrite them, or change them to H4 headings instead of H2 and H3. H4 headings are not weighted as heavily so they don’t count when Yoast calculates your SEO analysis.
Text length: Yoast likes to see blog posts contain at least 300 words. I always aim for at least 500, and usually 1,000 words or more.
Tips for optimizing your Title with Yoast
Keyphrase in title: Yoast may tell you to put your focus keyword at the beginning of your title. Your title is the most important part of on-page SEO. However, it is also important to have a good, catchy title. Sometimes it is okay to not have your focus keyword at the beginning of your title.
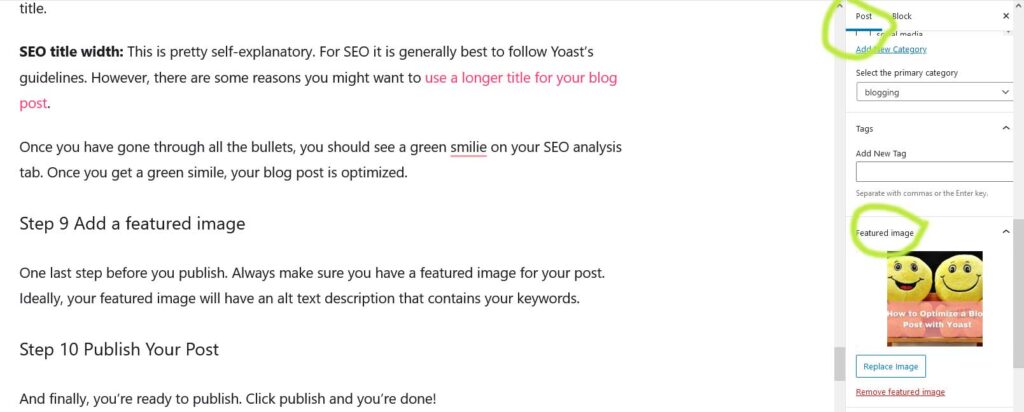
SEO title width: This is pretty self-explanatory. For SEO it is generally best to follow Yoast’s guidelines. However, there are some reasons you might want to use a longer title for your blog post.
Once you have gone through all the bullets, you should see a green smilie on your SEO analysis tab. Once you get a green simile, your blog post is optimized.
Step 9 Add a featured image
One last step before you publish. Always make sure you have a featured image for your post. Ideally, your featured image will have an alt text description that contains your keywords. You can add your featured image by going to the left sidebar of the Gutenberg editor. You will see it in the Post section, not the Block section.
Step 10 Publish Your Post
And finally, you’re ready to publish. Click publish and you’re done!
I know that was a lot of steps, but optimizing a blog post with Yoast is really easy. If you would like to get better at SEO, keep following my blog for more SEO and internet marketing tips.

I am Patty Malowney, the creator of Badass Web Goddess. I am an Albuquerque SEO and digital marketing consultant. I started my first internet business in 2004 with a $40 garage sale computer and a whole lot of determination. I sold my first website, JustMommies.com to the dating company eHarmony.com in 2008. My website was acquired by another company where I worked as a consultant and editor until July, 2019.
After encouragement from friends and family, I decided to branch out on my own and start my own consulting business. I offer advice and services to local businesses on how they can rank better in Google.
In addition to running Badass Web Goddess, I am an avid blogger. I run several blogs including my internet marketing blog here at Badass Web Goddess. If you love my blog, Follow Me on Facebook or Twitter!